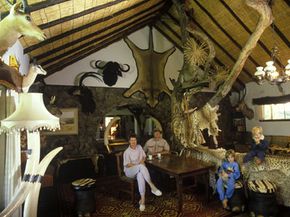
How Taxidermy Works

By: Charles W. Bryant
House of horrors
If you stand still long enough in this house, there's a good chance you'll be stuffed and mounted.
Romano Cagnoni/Getty Images

Let's say yo­u're watching an old horror movie, one about a reclusive madman who lives in the spooky mansion on a hill. Inevitably, there will be the scene where the local kids make their way into the creepy house. And nine times out of 10, the madman's lair will have two things -- a painting with the eyes cut out so he can keep tabs on unwanted visitors and a nice collection of mounted animals whose looming presence scares the intruders. You know the scene -- lightning flashes and the growling black bear is lit up in front of the kids' faces, sending them screaming into the front yard. Norman Bates of Alfred Hitchcock's "Psycho" is the perfect example. His office was chock full of dead animals, stuffed and mounted in frightening positions -- a sure sign that shower time is going to mean the end of you.  

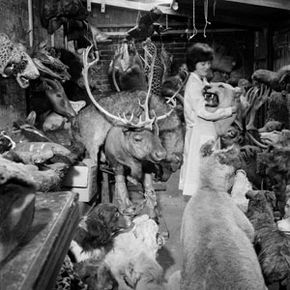
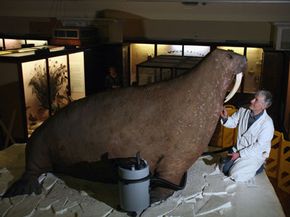
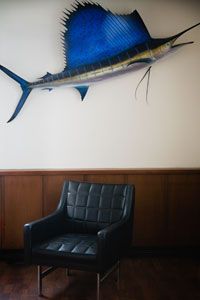
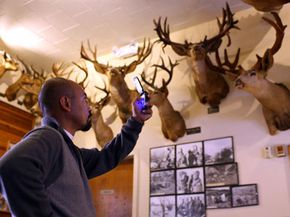
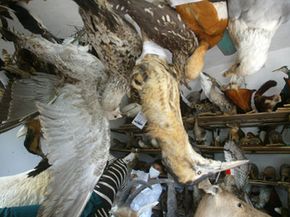
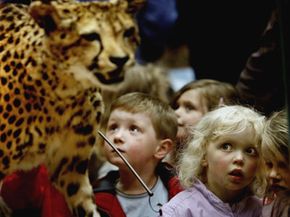
­The practice of taxidermy may creep some people out, but it's certainly not sinister like the movies portray it. Some people even consider it an art. Others throw it into the science category. The truth is, taxidermy is a mix of many disciplines -- sculpting, woodworking, sewing, painting, carpentry and tanning, to name a few. After a lull in popularity in the 1950s and 1960s, taxidermy has made quite a comeback. It's estimated that taxidermists rake in nearly $600 million a year in the United States alone [source: Orlean]. Some of this work is done for museums, but the lion's share comes from hunters and fishermen eager to display the fruits of their labor for all to see. When a picture just won't do, these outdoorsmen plunk down hundreds and even thousands of dollars to have a taxidermist preserve the memory of the kill through a fascinating process of preservation and recreation.

Advertisement

History of Taxidermy

Find the real animal
This house of horrors makes one wonder -- is the dog even real?
Chris Ware/Getty Images

Taxidermy was born in England, out of practicality more than anything. When the demand for leather increased, tanning became commonplace. Tanning is the process of turning an animal's skin, or hide, into usable preserved leather, and it made taxidermy possible. When new species of mammals, fowl and fish were still being discovered, naturalists sought to preserve them for classification. Famed British explorer James Cook was one of the early proponents of using taxidermy as he discovered new species during his travels. Charles Darwin was another early taxidermist who sought to preserve his findings at the Galapagos Islands.

Initially, taxiderm­y was a crude and unsophisticated process. Animals were literally gutted, their hides were tanned and then stuffed with cotton or straw and sewed back up for display. These early attempts didn't go over so well, though, because the animal was never properly preserved. This meant that the eyes, nose, teeth and tongue would eventually rot. Thanks to the discovery of the preservative properties of arsenic, taxidermy advanced by leaps and bounds.

Advertisement

In the early 20th century, taxidermy came into its own and became more of a respected art form. Wealthy aristocrats would fill their homes with mounted animals from all over the world. As big game hunting became more popular, so did the practice of displaying wild animals. The process of taxidermy was fairly static over the years until the 1970s. This was when the stuffing stopped. From that point, taxidermists began to stretch the animal's skin over sculpted molds, or mannequins, typically made from polyurethane foam. This is why you should never refer to an animal as "stuffed" anymore -- taxidermists prefer the term "mounted."

The Business of Taxidermy

I am the walrus
Derek Frampton gives the Horniman Museum's walrus a spring cleaning in London, England.
Matt Cardy/Getty Images

Pay a visit to your local taxidermist and you may be surprised with who you meet. If you're expecting some kind of hillbilly mad scientist with a thirst for blood, then you'll be disappointed. Most taxidermists are animal lovers who feel that preserving and displaying the animal is the ultimate show of respect. Some­ taxidermists work exclusively with non-hunted animals, which usually means road kill. Some only work with natural history museums, educational institutions and organizations like The Audubon Society. If you want to practice taxidermy, you'll need a permit from your state. They aren't expensive -- $6.50 in the state of Oregon -- and they need to be renewed each year.

If you have an animal you want mounted, plan on waiting a while. It's a slow-moving business, and you can expect to wait anywhere from two months to a year or more to get the finished product, depending on your needs. You may get your prize large mouth bass back sooner, but that moose you tracked and killed in Alaska is going to take a while. The actual process doesn't take a full year, but there aren't many taxidermists, and they usually have a backlog of frozen or freeze-dried fish, fowl and mammals waiting to be mounted. Another reason it takes a while is because many taxidermists use commercial tanneries, and the turnaround takes several months. It's a seasonal business because of hunting and fishing laws restricting the sports to certain times of year. Spring and summer means fish, and fall means deer, fowl and other large mammals. The taxidermist spends the winter and early spring working hard to finish up in time for the next fishing season.

Advertisement

The cost of a mounted animal all depends on the size and complexity of the mount. If you want that 6-foot bear you hit with your car to find a home as a rug in front of your fireplace, you can plan on paying around $1,000 [source: alaska.gov]. That same bear would double in price if you wanted it in a standing pose. Your average mounted deer runs in the neighborhood of $500 to $650, and fish only cost about $18 per inch. A duck or other fowl will cost you between $200 and $300 -- flying, standing or sitting.

Taxidermy Methods: Fish

Marlin
There's really no marlin in this synthetic marlin.
Ron Levine/Getty Images

­Ask any taxidermist and they'll tell you that fish are the toughest animals to work with. The reason is that the fish's skin loses color once it dries out. This means that the entire body of the fish's skin needs to be completely recreated with paint. There are several ways to go about mounting a fish, and the method is typically determined by the kind of fish. Skin mounts are best for warm water fish like bass. For this method, the fish is skinned using a razor sharp filet knife or taxidermy scalpel.

The eyes are removed, and the only thing left is the skin, head and tail. The skin and remaining meat that can't be removed from the tail and head area is then preserved by injecting different kinds of salts and formaldehyde. We're talking Borax and alum, not table salt. The Borax is then spread over the inside of the skin while it's still wet. This allows the fish to dry slowly and naturally, preventing shrinkage. Then the skin is either stuffed with filler material like firmly packed sawdust or it's stretched over a mold and shaped into the desired pose.

Advertisement

The fins are kept wet until the fish is sewn shut, then they're spread out and pinned to a cardboard backer to keep them in place while drying. The eye is the last thing to come into play. Once the fish has dried out, which can take several weeks, a glass eye with a pin attached to the back is stuck into the socket. A little paint and varnish, and the fish is ready to be mounted onto a wood plaque.

Cold water fish like salmon and trout have thin, smooth and greasy skin. This means the stuffing would show through, so the taxidermist almost exclusively goes with a foam mold. Some taxidermists use artificial heads and attach them to the natural skin to avoid spoiling and shrinkage.

Saltwater fish are almost always recreated using entirely man-made materials. A mold of the fresh catch is made and then cast in polyester resin that's been beefed up with fiberglass. Then the taxidermist carefully recreates the coloration of the fish by painting each scale from head to tail. Many times a generic mold is used because of cost, and the fish is painted to match a photograph. Synthetic mounts are also popular with catch-and-release fishermen.

Advertisement

Taxidermy Methods: Deer

Say cheese
A customer at Foster's Bighorn Bar in Rio Vista, Calif., takes a cell phone picture of some of the 300 taxidermy animal heads on display.
Justin Sullivan/Getty Images

Mounting a deer is a complex process that takes years to perfect. W­e can't give y­ou a complete "how-to" here. Entire books are written on the subject. But we can provide an overview of what takes place.

The first step in mounting a deer is to take precise measurements of the body. A buck hide stretched over a mold that's 3 inches too short will result in a sagging mess. The skinning, or fleshing, of the deer comes next. The goal here is to preserve as much of the original product, or cape, as possible. So the fewer cuts and tears the taxidermist can get away with will make it easier to sew up later. If a hunter isn't able to get the deer to a taxidermist within a few days of the kill, then he needs to skin it himself. An experienced hunter will be able to do so without a hitch, but a novice may end up mangling the hide and making it tougher for the taxidermist. As we mentioned before, many taxidermists skip the skinning and tanning step and send the animal out to a professional tannery to make the mounting process more efficient and because tanning requires so much square footage.

Advertisement

Once the meat is removed from the skin, the hide is salted for preservation. Salt pulls the moisture from the skin and tightens up the hair follicles. The inside of the ears, the nose, the muzzle and between the toes are all crucial to salt well because of the excess of moisture in these areas. While the skin dries out, the mold is prepared. Older methods of creating molds include wire frames and paper mache, but polyurethane foam is the medium of choice these days. The molds are incredibly accurate and detailed, with muscles and veins carved into place. Clay is used for the tricky areas around the eyes.

The antlers and skull are then removed. The real skull is discarded, and the antlers are then attached to the foam skull using screws after the skin is stretched over the glue-covered body mold. The trick is to get everything lined up and to ensure that the skin is nice and tight. After sewing the skin shut around the mold, glass eyes are inserted into the sockets and the deer is mounted onto a wooden plaque, usually from the shoulder to the antlers.

Advertisement

Taxidermy Methods: Fowl

That's so fowl
A worker touches up a zebra amidst a very fowl scene.
China Photos/Getty Images

The f­irst step in ­mounting a bird is to s­kin it. During this process all the meat and bones are removed, but the feet and talons are kept in place. After the bird is skinned and the excess fat is removed, the skin is washed in warm water with normal dish washing detergent to get it clean and non-greasy. The bird skin and feathers are then dried with a towel and hair dryer. This will fluff the feathers up. The remaining moisture is soaked up with a salt preservative.

­The next step is to turn the bird inside out and fill the head cavity with non-shrinking hard clay. The neck and body of the fowl is sculpted with polyurethane foam. Once the main body is ready, it's put aside, and wires are inserted in place of the wing, tail and leg bones. The wire is inserted under the skin of the wings and tied off with dental floss -- the same goes for the legs and tail.

Advertisement

At this point, the skin of the bird and the legs, wings and tail are taut from the wire. The foam body and neck are then inserted, and the wires from the legs, wings and tail are pushed into the body until firm. The molded neck sticks into the clay in the head area. The last step is to sew the bird up around the body mold using dental floss or carpet thread. Once the glass eyes are pushed into the clay socket, the bird is ready to be shaped into flying position and mounted.

Taxidermy Tips for the Outdoorsman

Yikes!
Young children look at exhibits at the Kelvingrove Art Gallery and Museum in Glasgow, Scotland.
Jeff J Mitchell/Getty Images

Unless you­ want to drop $2,000 to $5,000 on taxidermy school, you'll be relying on a local artist for your mounting needs. Choosing a taxidermist is crucial for ensuring a nice finished product. You may save a few bucks by going with a cut-rate operation, but when your bobcat ends up with a toothy smile, don't be surprised. Like with anything else, you get what you pay for.

Visit the taxidermist's shop and check out his work. If he doesn't welcome you into the shop, turn around and walk away. You should also ask for references. If the taxidermist did a good job, your mount should last a lifetime. You should also talk price and turnaround time beforehand so you both know what to expect. It's also advised to leave taxidermists alone until your finish date -- they're notorious for not taking kindly to phone calls inquiring about the progress. If you end up with a bad mounting job or if years later the mount has begun to deteriorate, a good taxidermist can fix your issues. Snap some detailed photos of the bad spots and take them with you, or simply take the mount if it's not too much trouble.

Advertisement

Here are some tips to follow if you're a hunter or fisherman and plan to have your animal mounted:

  • Keep the bird or mammals as dry as possible and cool.
  • Don't drag a deer if you can avoid it to help keep its hair intact.
  • Hang a deer to help cool it and never leave it lying on its side.
  • For birds, cut the foot from a woman's nylon hose and slip the bird into it to help preserve the feathers.
  • Wipe any blood from the feathers of your fowl.
  • Never use a basket, net or stringer for a fish.
  • Don't let a fish flop around inside a cooler.
  • Wrap fish in a soaking wet towel with the fins smoothed back.
  • Never wrap a fish in newspaper; it will soak up the moisture.

Following these steps will increase the odds of ending up with a nice looking mount.

­

Advertisement

Taxidermy FAQ

What is the process of taxidermy?
An animal’s skin is cleaned, preserved and then put onto a frame, which is modeled on the animal.
Can humans be taxidermied?
The idea of preserving a part of yourself forever might interest you, but it is illegal to perform taxidermy on humans.
Can you buy taxidermy animals?
Any piece of taxidermy can be bought as long as it is obtained via legal means. This means that endangered or federally-restricted animals cannot be taxidermied and sold under any circumstances.
How much does it cost to get taxidermy performed?
Performing a taxidermy on a fully grown animal can cost you anywhere between $2000 and $4000. The cost depends on the base and habitat of the chosen animal.
Is it legal to buy taxidermy?
Buying taxidermy animals is legal as long as the animal is not endangered or federally protected.

Lots More Information

­Related Articles

  • "Choosing a Texidermist." Turkey Creek Taxidermy. 2008.http://www.turkeycreektaxidermy.com/choosing.htm
  • "Fish Taxidermy Techniques." Taxidermy.net. 2008. http://www.taxidermy.net/information/fish1.html
  • "Taxidermist License: Frequently Asked Questions." Oregon Department of Fish and Wildlife. 2008.http://www.dfw.state.or.us/wildlife/license_permits_apps/faq/taxidermist_faq.asp
  • "Taxidermy: Frequently Asked Questions." Trophysafaris.com, 2008. http://www.trophysafaris.com/information/taxidermy-faq.htm
  • "The Origin of the Jackalope." Jackalope.org, 2008. http://www.jackalope.org/Douglas/DouglasJackalope.html
  • "Through College through Taxidermy." Profitfrog.com, 2008. http://www.profitfrog.com/profitable-hobbies-articles/taxidermist.htm
  • "What is Taxidermy?" Taxidermy.net, 2008. http://www.taxidermy.net/information/whatis.html
  • Aldrich, Eric. "How'd They Do That?" Wildlife Journal. 2008. http://www.wildlife.state.nh.us/Wildlife_Journal/WJ_sample_stories/WJ_e02_Taxidermy.pdf
  • Barkham, Patrick. "Back from the dead." Guardian.co.uk. August 8, 2006.http://www.guardian.co.uk/artanddesign/2006/aug/08/art
  • Davie, Oliver. "Methods in the Art of Taxidermy by Oliver Davie." Lostcrafts.com, 2008.http://lostcrafts.com/Taxidermy/History-Taxidermy.html
  • Murrell, Marc. "Taxidermy creates lasting memories." Topeka Capital-Journal. Nov. 25, 2007.http://www.cjonline.com/stories/112507/out_220332244.shtml
  • Orlean, Susan. "Lifelike." Susanorlean.com. June 9, 2003.http://www.susanorlean.com/articles/lifelike.html
  • Penn School of Taxidermy. 2008.
  • Vinnola, Anne. "Taxidermy: The Good, Bad and Ugly." Bowhunting.net. March 18, 2008.http://www.bowhunting.net/artman/publish/When_The_Game_Is_Down/Taxidermy_The_Good_Bad_and_Ugly.shtml
  • Woodford, Riley. "Taxidermists' Tips for Better Trophies." Alaska.gov. 2008.http://www.wildlifenews.alaska.gov/index.cfm?adfg=wildlife_news.view_article&articles_id=19&issue_id=14

Advertisement

Loading...